The 16th pair of
houses in our village is dedicated to the Fire
Department of our Jingle Bells Village. For this important and
revered institution I imagined a sturdy building with a traditional
look. The crowned top of the facade make it an impressive and yet
simple building.
The
companion house on the other side gets its inspiration from the
flamboiant :) liberty style, the 3 small loggias give to it a dreamy
and classy look.
Il
sedicesimo “capitolo”del nostro villaggio è dedicato alla
caserma dei vigili del fuoco del nostro Jingle Bells Village.Per
questa importante e riverita istituzione ho immaginato un edificio
solido con un look tradizionale, la sommità merlata delle facciate
lo rendono semplice ma di impatto.
La
casa che l’accompagna per contro prende ispirazione dal
“flamboiant” (fiammeggiante :)) stile liberty, le 3 loggette le danno un look sognante e signorile.
The Jingle Bells Village. PART
16. We are ready to show the new installment of our Christmas
Village.
Siamo
pronti a mostrarvi la sedicesima
parte
del nostro villaggio
di Natale.
The 3D windows first of all ( not from this design, but always made in the same way)
Le finestre 3D innanzitutto ( non da questo design, ma sempre fatte nello stesso modo)
The Making of the Fire Dept. Come si costruisce la caserma dei Pompieri.
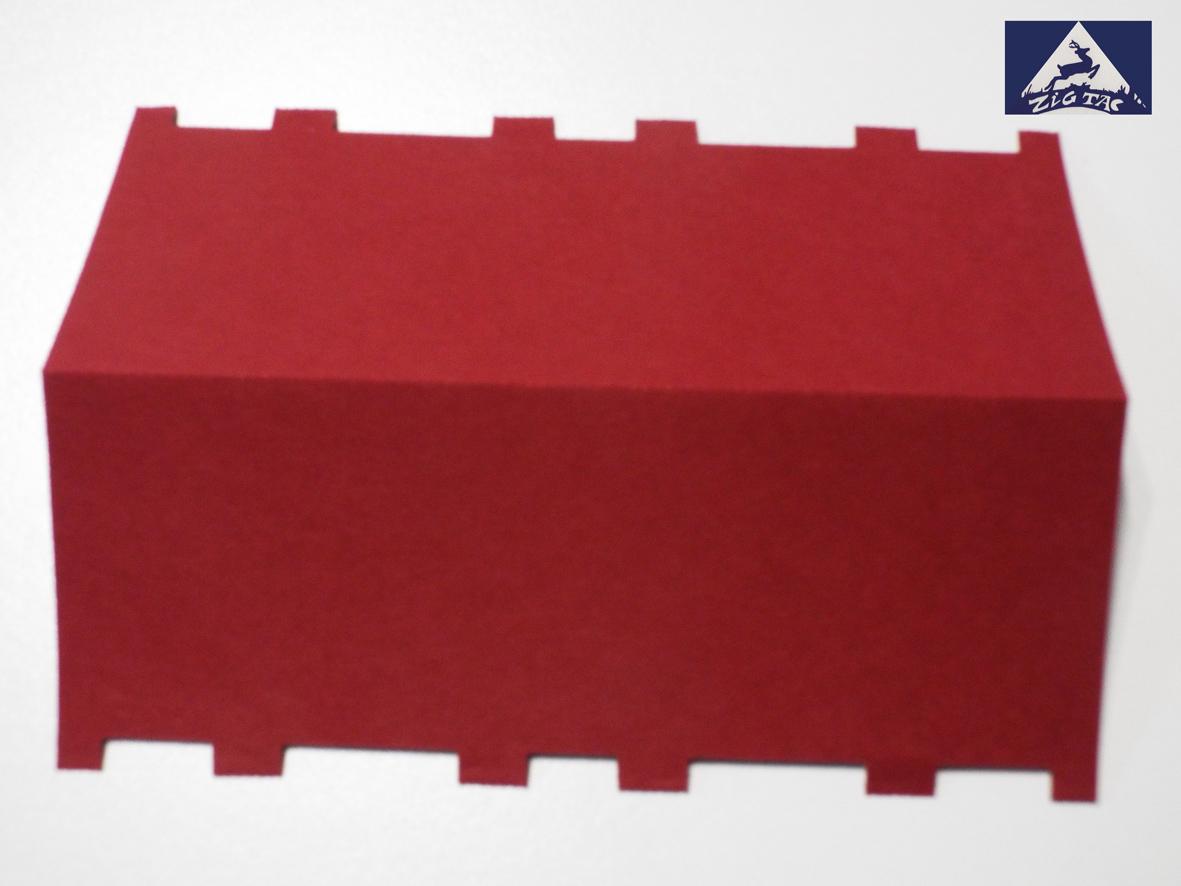
The main prospect
La facciata
Look at the back for placing right the doors of the garage
Guardate dal retro per posizionare correttamente le porte del garage
Then center the stone frames on the doors roof
Quindi centrate sulle porte le cornici di pietra
Fold back the tabs of the wall and align the the stone crown.
Abbassate le linguette della facciata e allineate il corinamento di pietra.
All the pieces needed for the back.
I pezzi necessari per il retro
Note that the roof will sit on the small tabs on top folded inward
Notate che il tetto poggerà sulle linguette in cima piegate verso l'interno
The side with the annex
Il lato con il corpo sporgente dell' l'ingresso
All the pieces needed.
I pezzi necessari.
The tab folded upward will be glued inside at the back of the wall
La linguetta piegata verso l'alto andrà incollata dentro sul retro del muro
The annex roof has a monogram in the tiling
Il tetto del corpo sporgente ha un monogramma disegnato sulle piastrelle
The alarm sign
Il segnale d'allarme
The alarm sign must be vertical and centered with the light hole
Il segnale d'allarme deve essere verticale e centrato col foro della luce
The red translucent paper inside
Il vellum rosso all'interno
At the back in corrispondence of the sign a small red translucent paper will become the alert light.
Sul retro dell'insegna un piccolo elemento di vellum rosso sarà la luce dell' allarme.
The other side
L'altro lato
The pieces needed
I pezzi necessari

Joining the walls
Unendo le pareti
Note that final parts of the stone crown of the facades fold on the sides to complete the joining of the walls
Notate che la parte terminale dei coronamenti merlati si piega sui lati a completare l'unione delle pareti
The corner stones must be perfectly aligned, working on a flat surface can help closing this last corner.
Le pietre d'angolo vanno allineate con attenzione, lavorare su una superficie piatta può aiutare a chiudere bene questo ultimo angolo.
The crown of the annex roof aligned with the side stones helps to finish the corner.
Il coronamento del tetto del corpo sporgente allineato alle pietre d'angolo aiuta a rifinire il tutto.
Placing the roof
Incollando il tetto


Note that the roof is glued on the small tabs on top folded inward
Notate che il tetto è incollato sulle linguette in cima piegate verso l'interno
The Making of the Fire Truck. Come si costruisce il camion dei pompieri.
Preparing the fenders shaping the rounded parts on a pencil, note that front and back fenders are different
Preparate i parafanghi modellandoli su una matita , notate che i parafanghi delle ruote davanti sono diversi
The Motor. Il motore.

The motor has at the extremities a part that foldf up to form a "square rod" for the wheels
Il motore alle estremità ha un parte che si ripiega a formare un "asse quadrato" per le ruote
The motor must be centered using the holes in the back part of the truck
Il motore va centrato usando i buchi nel fondo del camion
The seats. I sedili.

The seats element must be glued centered on the sides and aligned at the back with the beginning of the central tabs on the sides
I sedili vanno centrati sulla larghezza e sulla lunghezza finiscono allineati con l'inizio delle linguette mediane dei lati

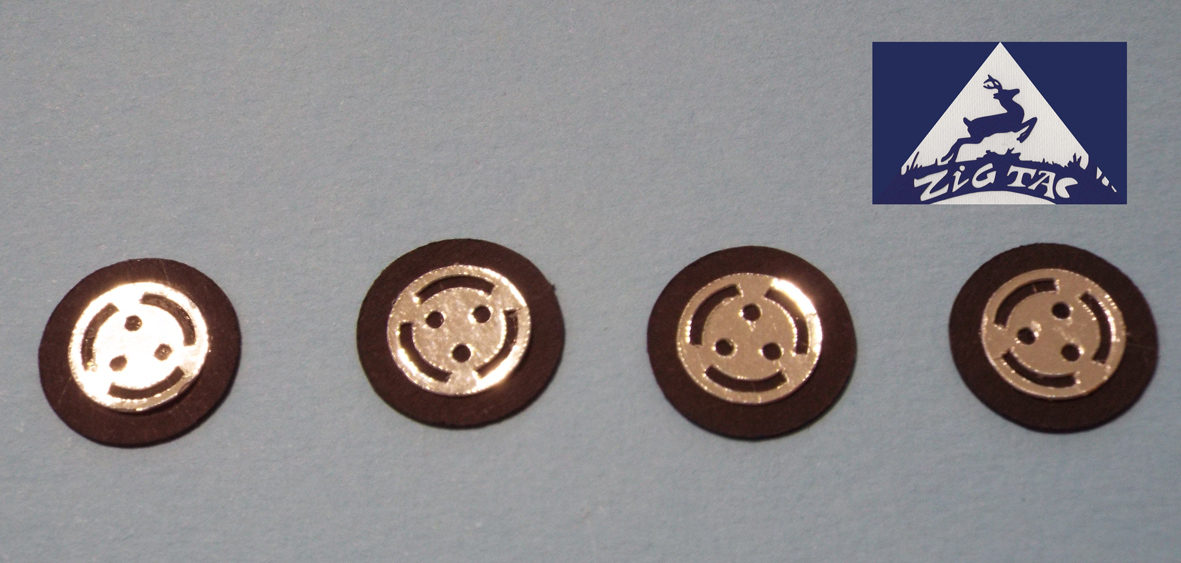
The wheels are not centered on their attaching surface, there is a short line cut in the larger disc that must be aligned with the lower side of the "square rod", in any case position the truck on a flat surface when the glu is not totally set so to adjust
Le ruote non sono centrate sugli assi , c'è un taglietto nella ruota grande che va allineato al lato basso del mozzo quadrato, in ogni caso posizionate il camion su un piano per fare eventuali aggiustamenti prima che la colla sia del tutto asciutta
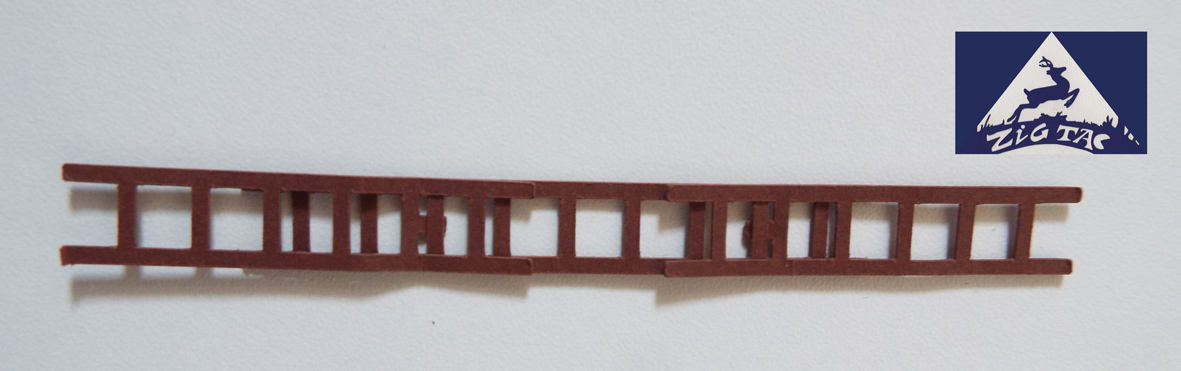
The aerial ladder device. Il macchinario delle scale.

The ladders can be joined in several ways to reach the desired length
Le scale possono essere unite in diversi modi per raggiungere la lunghezza desiderata
This element is the support for the ladder device, the hole in it is to center it on the truck pavement
Questo elemento è il supporto per le scale , il buco è per posizionarlo sul pavimento del camion
The bell on the roof of the track. La campana del camion.

The bell on the roof of the truck is made in two pieces to allow the use of one sided paper
La campana sul tetto del camion è fatta in due pezzi per rendere possibile l'uso di carta non double face
The Making of the Liberty house. Come si costruisce la casa Liberty.
The main prospect
La facciata
The front balcony frame has to
be glued carefully or it will show
at the back at the roof edge.
La cornice della loggia andrà incollata con attenzione altrimenti la colla si vedrà da dietro.
Attach wit glue the stairs of the main door to the facade so will stay in place when handling the house to turn on and off the lights.
Attaccate con la colla le scale del portone alla facciata così resteranno a posto quando aprirete la casa per accendere e spegnere le luci.
Remember to pinch/push back the windods crowns before inserting them so they will stai closer to the walls.
Ricorda di pizzicare e spingere indietro i timpani delle finestre prima di inserirle così resteranno più aderenti ai muri.
The side walls
I muri laterali
The simple door of the side loggias has one step only.
La porta semplice della loggia ha un solo gradino
All the walls
Tutti i muri
The base
La base
The big hole for the led tea light and the small ones for your fingers.
Il buco grande per la candelina led e i buchi piccoli per le dita.
The roof top has a small tab
at the front center where the frame of the facade is, this tab must
not be glued, just fold it backward and leave it free inside the
house as it is only a screen to avoid too much light out.
Al centro sul davanti del tetto c'è una aletta che non va incollata ma lasciata libera: è una sorta di paralume per evitare che troppa luce esca dal tetto.
The roof with glue on the back side tab, this will be attached first then will be the moment for the front side.
La colla sulla linguetta del retro del tetto, questa sarà incollata prima poi sarà la volta del fronte.
The last touch of glue. L'ultimo incollaggio
If you want to see the rest of the village
Se volete vedere il resto del villaggio:


No comments:
Post a Comment
grazie per il tuo commento